Bridging an amplifier is one of the most effective ways to squeeze more power out of your existing equipment without buying a separate mono amp.
Bridging a 4 channel amplifier combines two channels into one, effectively doubling the output power to drive a subwoofer or a single speaker with significantly more wattage. To bridge, connect your speaker’s positive terminal to the positive output of one channel and the negative terminal to the positive output of the adjacent channel (typically Channel 1 positive and Channel 2 positive). Most amplifiers label bridgeable pairs clearly in the manual.
Before touching a wire, there are a few critical things to understand about how bridging works, what your amp supports, and what can go wrong if you skip the safety steps.
What Bridging Actually Does to Your Amplifier
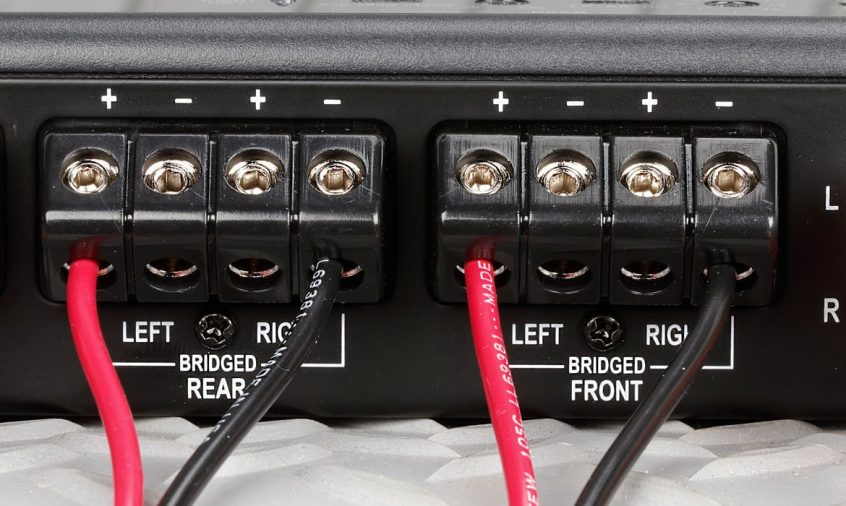
A standard 4 channel amplifier pushes separate audio signals through four independent channels. When you bridge two channels, the amp combines them in a push-pull configuration — one channel handles the positive half of the signal, the other handles the negative half. The speaker sees a combined voltage swing that’s roughly double what a single channel would produce.
In practice, this typically doubles the RMS power output on that bridged pair. A 4 channel amp rated at 75W RMS per channel might deliver around 150W RMS when bridged per pair. The exact output depends on your amp’s design, its power supply, and the load impedance.
The key tradeoff: bridging halves the minimum impedance the amp can safely handle. If your amp can drive a 2-ohm load per channel, it will only safely handle a 4-ohm load when bridged. Ignoring this is one of the most common causes of amplifier failure.
Verify Your Amplifier Supports Bridging
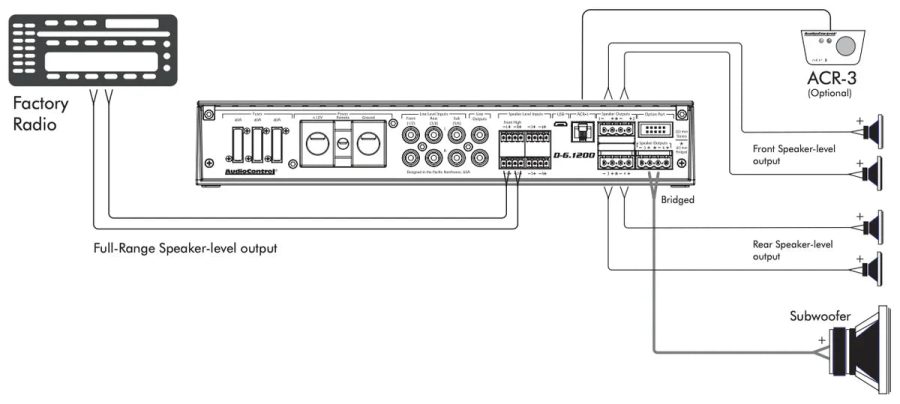
Not every 4 channel amplifier is designed to be bridged. Running incompatible channels in a bridged configuration can damage the output stage permanently.
Check for these indicators before proceeding:
- Owner’s manual bridge mode instructions — the most reliable confirmation
- “Bridgeable” or “Bridge Mode” label near the speaker terminals
- Bridged power ratings printed on the amp (e.g., “2 x 150W bridged”)
- A bridge mode switch on the amp’s face or side panel
If the manual makes no mention of bridging and there’s no label, assume the amp is not designed for it. Running non-bridgeable amps in a bridge configuration is risky and often results in blown output transistors.
Minimum Impedance: The Most Important Specification
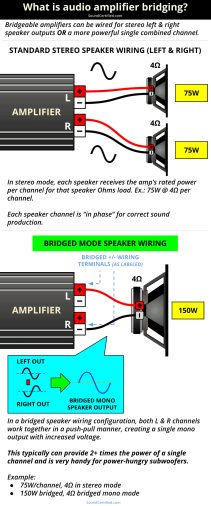
This is where many DIYers go wrong. When bridging, your speaker’s impedance must meet or exceed the amplifier’s bridged minimum rating.
| Amp Channel Rating | Bridged Minimum Load |
|---|---|
| 4 ohms per channel | 8 ohms bridged |
| 2 ohms per channel | 4 ohms bridged |
If you connect a 2-ohm subwoofer to a bridged pair rated for a 4-ohm bridged minimum, the amp will overheat, enter thermal protection repeatedly, or fail outright. Always match impedance before wiring anything.
Check the back of your subwoofer or speaker for the impedance rating. A dual voice coil sub wired in series will have double its rated coil impedance — a 2-ohm DVC sub wired in series becomes a 4-ohm load, which can be ideal for bridged setups.
Tools and Materials You’ll Need
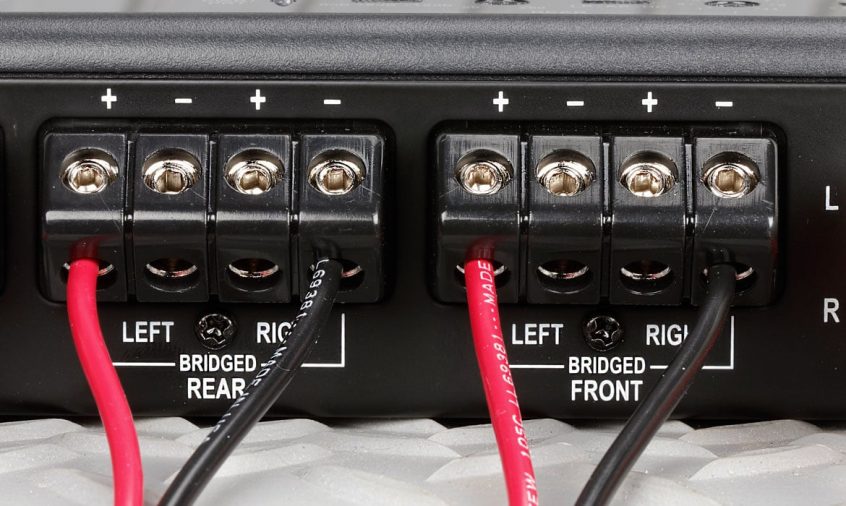
The wiring process itself is straightforward, but having the right tools prevents mistakes.
- Owner’s manual for your specific amplifier model
- Wire strippers
- Crimping tool or soldering iron
- Appropriate gauge speaker wire (typically 16 to 12 AWG depending on run length and power)
- Electrical tape or heat shrink tubing
- Multimeter (optional but useful for confirming polarity and continuity)
- Small flathead or Phillips screwdriver for terminal screws
Step-by-Step: How to Bridge a 4 Channel Amplifier
This procedure assumes your amplifier supports bridging and you’ve confirmed compatible speaker impedance.
Step 1: Turn off and disconnect power
Disconnect the amp from the vehicle’s power source by removing the main power fuse near the battery. Never work on speaker or signal wiring with the amp powered.
Step 2: Identify the bridgeable channel pairs
Most 4 channel amps bridge as Channels 1+2 and Channels 3+4. The terminals are usually labeled with bridged polarity markings. Consult your manual — some amps have different pairing configurations.
- Step 3: Locate the correct output terminals
- For a typical bridged setup on Channels 1 and 2:
- The positive terminal of Channel 1 becomes the bridged positive output
- The positive terminal of Channel 2 becomes the bridged negative output
This may seem counterintuitive. Both wires use the positive terminal of their respective channels. This is the correct configuration for most amps — the two channels are wired out of phase internally to create the push-pull signal.
- Step 4: Connect the speaker wiring
- Run the speaker’s positive wire to Channel 1’s positive terminal
- Run the speaker’s negative wire to Channel 2’s positive terminal
- Tighten terminal screws firmly. Loose connections cause distortion, intermittent output, and heat buildup
Step 5: Enable bridge mode if required
Some amplifiers have a physical bridge mode switch that must be toggled. Others configure automatically based on wiring. Check your manual. If there’s a switch and you don’t activate it, the amp won’t behave correctly in bridged mode.
Step 6: Reconnect signal inputs
In bridged mode, signal typically feeds into only one channel of each pair. Most amps use Channel 1’s RCA input for the bridged 1+2 pair. Some amps internally route the signal — again, check the manual.
Step 7: Restore power and test at low volume
Reconnect the inline fuse near the battery. Start the vehicle, set the volume low, and listen for output. Gradually increase volume while checking for distortion, clipping, or unusual heat buildup on the amp. Normal operation should produce clean, controlled output.
Common Bridging Mistakes and How to Avoid Them
Using the wrong terminals — connecting positive to negative instead of positive-to-positive on adjacent channels. This will result in no output or a short circuit condition.
Ignoring the impedance minimum — the single most damaging mistake. Thermal shutdown is the amp’s protection mode; repeated shutdowns stress components and shorten lifespan significantly.
Forgetting to set gain correctly — a bridged amp drives more power into the speaker. Gains set for unbridged operation will now overdrive the speaker. Set gains conservatively and use a multimeter or oscilloscope to match input sensitivity properly.
Running all four channels bridged to underpowered speakers — bridging both pairs and feeding moderate-sensitivity speakers with too much power will cause speaker damage before the amp trips protection.
Skipping the manual entirely — different brands handle bridging differently. Rockford Fosgate, JL Audio, Alpine, and Kenwood all have unique terminal labeling conventions. The manual removes all guesswork.
Bridging Two Pairs vs. One Pair
A 4 channel amplifier gives you flexibility in how you use bridging.
Option 1: Bridge both pairs
Both channel pairs (1+2 and 3+4) are bridged, effectively converting the amp into a powerful 2 channel unit. This works well for powering two subwoofers or two full-range speakers requiring high power.
Option 2: Bridge one pair, run two channels normally
Bridge Channels 3+4 to power a subwoofer, while running Channels 1 and 2 at full stereo for door speakers or component speakers. This is a practical configuration for a single sub setup where you still want amplified front speakers.
Option 2 is one of the most common configurations in car audio installs — it avoids buying a separate dedicated mono subwoofer amplifier while still powering front-stage speakers properly.
Gain Setting After Bridging
Gain structure is often overlooked during bridging setups. The gain control on your amplifier is not a volume control — it matches the amp’s input sensitivity to the output level of your head unit.
After bridging, the amp’s output power to that speaker has increased significantly. If you don’t readjust the gain downward (or use a more careful matching process), the signal chain will clip before the speaker handles it cleanly.
The most reliable method for setting gain is with a multimeter or a Digital Multimeter like the Fluke 117 Electricians True RMS Multimeter — set to AC voltage, measuring the speaker terminals while playing a test tone. Match the voltage to your speaker’s rated power handling using the formula: Voltage = √(Power × Impedance).
For most car audio enthusiasts setting gain by ear, reduce the head unit volume to about 80% of maximum, then slowly increase the amplifier gain until the bass becomes audibly distorted — then back it off slightly. It’s an approximation, but it keeps most setups in a safe range.
When Bridging Isn’t the Right Move
Bridging isn’t always the best solution for every system. If your subwoofer is already rated at or near the amplifier’s bridged RMS output, bridging may produce more power than the speaker can handle safely — leading to burned voice coils.
If the amplifier runs hot even in normal operation, bridging will increase thermal load further. Amplifiers in tight enclosures with limited airflow are often better left in standard configuration unless the install allows for proper heat dissipation.
Some low-cost 4 channel amps advertise bridging capability but set the bridged minimum at 8 ohms — limiting you to only 8-ohm speakers, which are uncommon in car audio. Check that specification before purchasing an amp with bridging as a primary goal.
FAQ
Can you bridge any 4 channel car amplifier?
No. Only amplifiers specifically designed and rated for bridging should be used in bridge mode. Using an unbridgeable amp in a bridged configuration risks permanent damage to the output transistors. Always check the owner’s manual and look for a bridged power rating or a bridge mode switch before attempting this wiring configuration.
Does bridging a 4 channel amp really double the power output?
In most cases, yes — bridging approximately doubles the RMS wattage compared to a single channel’s rated output. However, the actual increase depends on the amp’s power supply design and the impedance of the connected speaker. Some amps achieve closer to 1.8x power depending on internal architecture and thermal headroom.
What is the minimum speaker impedance when bridging a 4 channel amp?
The minimum safe impedance for a bridged amp is typically double the per-channel minimum. If the amp handles 2 ohms per channel normally, the minimum bridged load is 4 ohms. Connecting a speaker below the bridged minimum impedance will cause thermal shutdown, distortion, or permanent amplifier failure.
Can I bridge a 4 channel amp to run a subwoofer and still power my door speakers?
Yes, and this is a very practical setup. Bridge one pair of channels (typically Channels 3+4) to drive the subwoofer, and run Channels 1 and 2 in standard stereo mode for the front speakers. This eliminates the need for a separate mono amplifier while still powering the full speaker system efficiently.
Why does my bridged amp keep going into protect mode?
The most common cause is impedance mismatch — the speaker load is below the bridged minimum the amp can handle. Other causes include insufficient power supply voltage at the amp (check ground and power connections), inadequate airflow causing thermal overload, or a faulty speaker with a partial short in the voice coil. Start by checking speaker impedance and connection quality before assuming the amp is defective.
What gauge speaker wire should I use for a bridged amplifier connection?
For bridged subwoofer connections with runs under 4 feet (1.2 meters), 14 AWG is generally adequate. For longer runs or higher-power applications, 12 AWG provides better current handling and reduces resistance-related power loss. Always check the amplifier’s manual for specific wire gauge recommendations, as output power levels and terminal sizing vary between models.
Is it better to bridge a 4 channel amp or buy a dedicated mono amplifier for a subwoofer?
For most moderate-power setups, bridging a 4 channel amp is a cost-effective solution that works well. A dedicated mono amplifier typically offers better efficiency, lower distortion, and is purpose-built for subwoofer frequencies. If you’re running a high-power subwoofer system (500W RMS or above), a dedicated mono amp with a stable 1-ohm rating will generally outperform a bridged 4 channel in both reliability and sound quality.
Bridging a 4 channel amplifier is a straightforward wiring change that significantly increases output power — but only when the amp supports it and the speaker impedance is matched correctly. Confirm bridging compatibility in your manual, double-check impedance ratings, readjust your gain after wiring, and test carefully at low volume before pushing the system hard. Those four steps prevent the majority of bridging failures.